Tuesday, February 5, 2013

How to Make free phone calls with new Skype


Skype App for Android and Make free phone calls. Few tricks to get the most out of the recently updated Skype app for Android. Talk is good, everyone knows that, and if you don't use Skype, then it's fair to say that you're missing out on a decent chunk of the talking you deserve to be having. The service essentially lets you make free phone and video calls with your friends on Skype, send out IMs, files and pictures, and keep all of your contacts in the same place.

The latest update to the Skype app has brought some neat new features, as well as support for Android tablets, all of which bring the Microsoft-owned communication tool bang up to date. While Skype app might still look like the same old Skype, there are a few differences under the hood that smooth off some rough edges and let you concentrate on having a good old-fashioned chin wag.

So if you're new to Skype, or you've been using it for a while, there's probably going to be some good stuff in our detailed thirteen-step guide to getting you started and getting talking quickly and easily. Install the Skype app and we'll get going...

1. Tell the world

Download and install the Skype app from Google Play as you would normally. First up, you’ll want to add a status message to your profile. It’s not essential, but it makes the place look tidy. If you’re new to Skype, you’ll want to add a profile picture as well, so everyone knows it’s you.

2. Make some friends

Now you’ll want to add some contacts to Skype. Tap on the Contacts tab from the main menu, then bring up its options and tap Add Contacts on Skype. From here you can search the Skype directory and your own contact book to find your friends and members of your family.

3. Check up on people

Once you’ve added contacts they’ll be included in your contact list in Skype app, which you can access from the main page of the application. Here you can search for people directly to send them messages, make phone calls to them, or invite them into group chats on Skype.

4. Filter for clarity

If you find you’ve suddenly got too many Skype friends, you can add various filters to your contacts that show you only those who are online when you log in. To do this, tap where it says All contacts at the top of the screen then choose one of the options that pops up.

5. Profiles

Tapping on a contact brings up the ways you can interact with that person, as well as letting you check out their Skype profile. If you’ve connected with your Microsoft account, you won’t be able to call contacts from the app if they’re not signed up to Skype.

6. Get more info

If you tap on the More option on a person’s profile, you’ll see a host of extra contact options to select. Among them is the one that lets you send a file over to another Skype user. Tapping that option will take you to a screen that lets you choose what to send.

7. Another way to send

If you’re not in the Skype application but you still want to share a particular image or a file with one of your Skype contacts, the app should appear in the drop-down list that appears when 

8. Make some calls

Now you’ve made some friends and interacted with them, if you want to call mobiles and landlines, you’re going to have to add some Skype credit. Head to your profile to check your balance. If it’s low, you can add some more using a credit or debit card by tapping on your balance.

9. Create a connection

Once your credit has been loaded onto your account, head back to the main page and tap Call Phones. That will then take you to a simple and familiar dialer screen. You’ll need to select the international dialing code for the country you’re calling by tapping on the flag.

10. Skype calls are free

If the person you’re contacting has Skype installed on any one of their devices, then your call is free. You’ll see the same call screen whether you have selected to make a video or a voice call. If the other person isn’t signed in, then the call won’t be able to connect.

11. Change your quality

If you find your video calls aren’t clear enough in Skype, or that you’re using too much data when you’re out and about on the move, you can change the quality of the video by bringing up the settings menu from the front page of the app. Check either High or Low to make the change

12. Sort the notifications

While you’re there, you can change the notification settings of the application to suit how you use Skype. The default General settings are pretty intrusive, especially if you’re in a number of group chats, so find the level that suits your level of Skype use best.

13. If in doubt...

If you ever get stuck, there’s a really useful help section built into the Skype application that should be able to get you out of most tricky situations. Just bring up the menu from the Skype app’s front page, and you’ll find the section at the bottom. The Top FAQs solved any problems we had.
How to Deal with duplicate contacts Android

duplicate contacts and how to get rid of people with more than one set of contact details in your address book. If you're on your second or third Android device, it's pretty easy to find it clogged up with a bunch of duplicated contacts. You've probably dragged some across with you from an old SIM card, transferred them over via Bluetooth, or got someone in your address book as
Twitter contact, phone number and email address. 


Fear not though, there are a few ways you can quickly and easily get rid of contacts with more than one entry in your all- important address book. As well as your device's contact book, you're going to need a web browser handy to help with the spring cleaning as well. Remember, check carefully before you delete any contacts. You might have two Jims because you know two Jims, not because Jim is in your address book twice. When you're ready to go, head on to the first step and start your spring clean.

Let Google help

First up, if you’re using your Google account on your Android device, there’s a handy way to merge duplicated contacts. Simply head over to contacts.google.com, click More, then click Find & merge duplicates. If there are any, they’ll link together as quick as your browser can load.

Address book

Once you’ve done that, bring up your device’s address book. Obviously devices are going to differ in the way they’re set up and the options they have. The options we’re talking about will be there, they just might be in a slightly different place so keep a watchful eye.

Lose some accounts

It’s likely that when you linked your Facebook or Twitter accounts to your smartphone they imported all of their contacts into your contact book without linking them to people. Bring up the app’s menu, tap Accounts, and you’ll be able to get rid of them. 

Make a custom list

If you’ve still got duplicate contacts, it might be worth building a custom list of who to display. Hit your menu option again, then tap ‘Contacts to display’. You should see some different accounts and profiles. Tap the cog next to ‘Customised list’ to build your own.

Choose who to see

You can now pick and choose which sections of which contact list you get to see in your device’s contact book, ensuring you’re not adding superfluous contacts to the list and ensuring everyone you need to get in touch with is right there at your fingertips.

Phones only please

Perhaps the simplest way of ensuring you’re not seeing duplicate contacts is to only show contacts with phone numbers. To do this, tap Menu>Settings, then check the right box. No more Twitter contacts getting in the way when you’re trying to find the right person to text. 

How To Succeed In Making Money As An Affiliate Marketer


When it comes to making money online, the opportunities are endless given the wide range of options to choose from. One of the most lucrative and fulfilling opportunities is affiliate marketing. Basically, the job entails promoting a particular website and encouraging users to sign up as a regular member of the site. Wondering how you can take advantage of the money-making potential of affiliate marketing? Here are some tips to help you become a successful online marketer:

Choose a product or service to sell


The good thing about affiliate marketing is that you can offer almost anything under the sun from electronics to jewelries, books, clothing, or food. This gives you more flexibility in making money. However, it will be best to sell a product or service that you like. This way you can focus more on developing a strategy on marketing your chosen product or service.


Create a blog or website


With a website or blog, you can place your affiliate links and generate more potential customers in the process. You can even buy your own domain and boost your credibility and have more control of your website or blog.

Write content for your website or blog


Your website will be useless if you do not add regular content to it. How can you make a customer visit your site, if it only has one or two links or an empty page? It is important that you update your website content on a regular basis so you can have potential buyers visit your site. If you have a knack for writing, you can take advantage of your talent in writing your content. Otherwise, you can pay someone else to write for you.

Drive quality traffic


To become successful as an affiliate marketer, you need to be able to generate quality traffic to your website. Quantity is good but there is no assurance that they will regularly visit your website. Again, there are many methods available online for increasing website traffic. It is best to exhaust every possible method to boost reader visits to your website.

Learn and educate yourself


Especially if you are just a beginner, being a successful affiliate marketer requires continuous reading and education on your part. Check out the Internet and read some tips from known affiliate marketers. Quoting the words of the great Socrates “The day you decide you’re done learning and think you know everything is the day you realize you don’t know anything yet,” means that you should never stop learning.

Be patient


Like everything else in life, success does not come at a wink of an eye. It takes a lot of hard work and dedication before you can bear the fruits. The money will come at the proper time so do not loose hope and just do what needs to be done.

Affiliate marketing is just one of the possible avenues you can take advantage of in order to make money on the Internet. Just remember the above tips and you are on your way to becoming a successful affiliate marketer.

Guest: Melvin Magadia is a writer and blogger for Branders selling personalized business card holder. He writes helpful guides about a wide range of topics but concentrates most on business, technology and travel-related posts. 

How to Add custom themes with Apex Launcher

Apex Launcher helps you create your own customised home screen. The home screen with Apex Launcher is the entry point and immediate experience that all users encounter. The default backgrounds and layout perform a function but do not always add personality. Users are individuals and have their own quirks and preferences when it comes to using a smartphone.

Apex Launcher is an app that lets users create the home screen experience they want. There is the option to change wallpapers, add widgets, add shortcuts, add additional home screens, selected Apex actions and add complete themes if desired. The modification and addition of new elements are only part of the Apex Launcher experience. With new elements in place users can tweak, move and fine-tune. A great example of what's on offer is the option to resize and reposition widgets. Different widgets can hog more space than others. A simple tap-and-hold reveals the resize option, allowing users to resize the widget to neatly sit in the current grid. Here's a closer look at some other features. 

Apex Launcher default
Installing the Apex Launcher will change the current default home screen setup. Tapping the Home button will offer the option to open using the default setup, an alternative setup (if available) and Apex Launcher. Select this option to switch to your new-look home screen.

Home screen
The default screen will add three elements to the screen along with a new quick launch arrangement. Google apps, including the Play store, are arranged into their own folder. The remaining shortcuts give access to the Apex menu and settings. To arrange, tap, hold and drag. 


Apex actions
Tap Apex menu, Select Add and tap Apex actions. This list includes Default screen, Notifications and Recent Apps. To add an action to the home screen, simply tap the option of choice. Repeat to add more actions. To remove an action, tap, hold and select Remove.

Shortcuts
Tap Apex menu, Select Add and tap Shortcuts. This will list all the shortcuts currently available. This will include music playlists, direct links to Dropbox, an email inbox and apps. Selecting Apps will reveal all your installed apps. Simply tap one to add it to the home screen.

Add Widgets
Tap Apex menu, Select Add and tap Widgets. Available widgets, eg Bookmarks, Calendar, Google Drive,Facebook and Gmail can be added. Different widgets are various sizes onscreen. To resize to get more widgets onscreen, tap, hold and select Resize. Now drag the handles. 

New wallpaper
Tap Apex menu and select Wallpaper. There will be several options for choosing a new wallpaper. Select the desired option, locate a wallpaper of choice and tap Preview to see it in action. Tap Apply to add the selected wallpaper and choose Apex Launcher if needed.

Replacement themes
Tap Apex menu and select Theme settings. This will reveal installed themes, including the default Apex theme. Tap a theme to view which elements are active, tap to remove and hit Apply to use. To add a new theme tap Get More Themes, select your preferred choice and install.

Manage apps
Applying a new theme typically adds new icons, fonts and wallpaper, but still retains the Apex setup. Tap Apex menu and select Manage apps. This will display the Apps settings, including the internal storage being used. Switch to another tab to view apps under that category.

Control your screens
Tap Apex menu and select Manage screens. This will display all of your current screens. Tap the V screen to add a new screen. Tap, hold and drag a screen to reposition. To delete a screen from the current setup, tap, hold and drag to remove at the top of the screen.

Edit info
w Shortcuts have a default icon and label. These can be modified to suit. Tap and hold a shortcut to bring up a menu and select Edit to open Edit shortcut. Tap the icon to select a new one, tap Apex Launcher to select an alternative shortcut and tap Text to add new text. Press OK.

Lock desktop
After making modifications to the current home screen setup there is the option to lock the desktop. This will stop ‘tap-and-hold’ working. Tap Apex menu and select Lock desktop. Hit Yes to lock. To unlock the desktop, repeat the process but select Unlock desktop.

Standard settings
Home screen settings lets the user choose a new grid layout and manage screens. Drawer settings allows users to choose style and animation, while Dock settings relates to the number of pages and icons and Behaviour settings controls home key action and gestures.

Advanced
Select Advanced settings. This enables the user to customise the menu and choose which elements to show or hide. There is the option to allow for the resizing of widgets, plus the ability to set a default launcher, select language and whether or not to report usage and errors. 

How To Send Info From Google Chrome To Phone

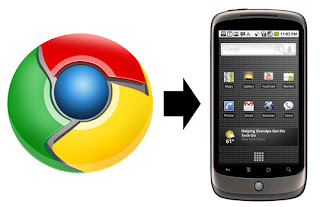
Send info from Google Chrome to your phone - Send links, text and maps from a browser to a phone using Google Chrome to Phone.

The web is undoubtedly one of the best sources of information and entertainment currently available. Google Chrome to Phone is a Google Chrome browser extension that helps to bring that information to an Android phone.
The extension creates a link between the browser and phone via a Google account. Users without a Google account will need to set one up before the extension can be used. Alongside the extension, an Android app needs to be installed on a device. This will need to have the same Google account details as used when signing into the browser extension. Users get to select an account if there is more than one when setting up the app.

Sign in via the browser and it's time to start sending info and links to a phone. Send a YouTube page and instantly watch, send a phone number and 
call or send a Google Map and view. All links and information are safely stored in the app's History feature ready to be used again and again.

Get Chrome
The Google Chrome to Phone app needs the Chrome browser extension to be installed. Head to the Chrome web store (https://chrome. google.com/webstore) and do a search for the extension. From the search results click the Add to Chrome button to install the extension.

Sign in
The installed extension will add an icon next to the browser’s address bar. To start using the extension, users will need to sign in with a Google account. Click the icon, select Sign in and do so with your individual login credentials. Now grant access to the application.

Install app
Head to the Google Play store on the Android device you wish to use with the browser extension. Search for Google Chrome to Phone and tap lnstall>Accept & download and open the app. Now follow the onscreen instructions to set up the application.

link options
The last step in setting up the Chrome to Phone app is the link action preference. By default, this is set to automatically launch links. The alternative is to launch links manually. This adds an alert notification in the Notifications panel. Users will need to drag down and select the link.

Change link preference
The link action preference can be changed from automatic to manual, or vice versa, at any point you like. Open the application, tap and hold the Menu button and select Settings. Simply select the appropriate links option and head back to the app’s home screen. 

YouTube
With the links preference set to the default option, sending a YouTube link will automatically launch the video. A pop-up window will appear requesting which app to view with. Select YouTube if it’s installed on your device. Tick the Use by default option to action all the time.

Text snippet
Select text from the desired website and hit the icon to send. This will cause the Complete action using window to open; select a browser to continue. This will open the webpage, but the text is saved on the clipboard. Open a text document, tap and hold and select Paste to add text.

Google Maps
Head to Google Maps on your desktop machine and send a link. This could either be an area or directions. A Complete action using window will ask the receiver to choose an application to open the link. Select Maps to open the area or direction chosen originally.

Phone number
Websites typically contain contact information such as phone numbers. To send a number on a site simply select the number and click the Chrome to Phone icon. The number will appear, ready to call. Tap the Save to People button and create a new contact if necessary.

History
Opening the Google Chrome to Phone application presents a straightforward History screen. This is divided into four different categories: Today, Last 7 days, Last Month and Older. To view the content in each section simply tap to open and tap again to close.

Opena link
Each link in the History has a number of options than can be called into action. To view the options for a link, tap it. To launch a link, hit Open. This will present a selection of pre-installed apps to choose from eg Chrome, Internet, YouTube - depending on link type and apps installed.

Working with links
Alongside the option to Open a link there is Add Bookmark, which adds a bookmark to the default option. Tap Share Link to choose an option to share with, eg Dropbox, Google Drive or Bluetooth. To delete a link from the list simply select Remove from history.

Disconnect phone
After a phone has been set up it automatically receives stuff from the connected browser. To stop receiving links from the browser extension, the phone needs to be disconnected. Tap and hold Menu and select Settings. Now tap the Disconnect.

How to Share In The Cloud With SkyDrive


Sharing in the cloud with SkyDrive

Get the new Windows 8 cloud service working with your Android device SkyDrive is Microsoft's cloud solution that offers users 7GB of free storage and the opportunity to sync and share via desktop and device. To use the service effectively users will need a Microsoft Live account and the appropriate version of SkyDrive. Mac and PC users can download a version for the desktop where a SkyDrive folder is automatically created. SkyDrive creates three default folders within the SkyDrive folder. Opening the folder reveals a standard window which allows users to drag and drop and populate with content.

The desktop solution can sync and share with any smartphone or tablet running the SkyDrive app. Android users will need to download the free app from the Play store and sign in to start sharing.

The default setup uses three folders, but the option to add additional folders is an easy task via the app or the desktop. Two views, grid and list, are easily 
interchangeable, and selecting a file, or folder, activates a host of options. Share a link to allow others to view or view and edit via email, Bluetooth or other installed cloud storage services such as Google Drive. Alternatively, a complete file can be exported via email or again via an installed service.

SkyDrive account
To use the SkyDrive service, a SkyDrive account is needed. This can be set up via https://signup.live.com. Alternatively, to use SkyDrive effectively the appropriate software needs to be installed on a computer. When installing the software there is the option to set up an account.

Add files
After installing SkyDrive, users can add files via the desktop. A SkyDrive icon will appear in the notification bar/dock; from here, open the SkyDrive folder. This will contain three default folders: Documents, Pictures and Public. Drag files and folders into the chosen folder.

Log in
Head to the Google Play store and search for the SkyDrive application. Install the app and open it on your device. Now locate the app then tap to activate SkyDrive. Before the app can be used, users will need to sign in. After logging in you are presented with the default folders. 

View and delete
To view the contents, simply tap the folder. To change from the grid view to the list view, hit the list icon (bottom-left). Next to each folder is a checkbox. Tap to select a folder and activate the delete and share buttons. Tap the trash icon and confirm to delete a folder.

Share folder
To start, select the desired folder. Note, only one folder can be selected at a time. Next, tap the share icon. By default, the View only option is selected. To allow for editing, select View and edit and tap OK. Now choose the option to share the link to, for example, Gmail.

Share file
To share a file, open a folder such as Documents and switch to the list view. Next to each file in the list is a checkbox. Now select a file (only one can be selected at a time) and tap the share icon. Choose an option and select a service eg Google Drive. Name the file and select a folder.

New folder
To add a new folder alongside the default folders, tap the folder icon. Name the new folder and press the OK option that is visible. To add a folder within a folder, simply repeat the process. 

Download
To download a file from SkyDrive to the device, first select the desired file by tapping the associated checkbox. Now tap the Download icon and the selected file will be downloaded to the device. This will typically be to an SD card and opened ready to view or edit.

Export
SkyDrive files can be exported to another location using the Export option. Again, select the desired file by tapping the checkbox. Now tap the Export icon; the file will be downloaded before a list of options appear. Select one. Tap the Use by default button to always use the selected option.

How To Automate Your Life With Android


Automate your life with Android Save time and let your Android device make all the effort.

Your time is precious, and having to begrudgingly go through your phone to complete the things you enjoy is a bit of a pain. Luckily, there are a wide range of shortcuts and applications available that can help you complete the tasks you love to do on your smartphone, a whole lot faster.

Things like accessing your email, reading web content a lot quicker, and programming your phone to complete tasks means you'll spend less time on your phone, and more time being able to do other things.
In this masterclass we'll be looking at various ways you can shave the minutes off your phone usage. Here's five tips to get kick-started...

Time-saving tips
When typing out long messages, make sure to take full advantage of the predictive text feature that is included with most keyboards. This allows you 
to simply type the first few letters of a word, and then select the full word from the suggestions the keyboard displays.

Instead of having to manually upload documents and videos to your cloud storage accounts, apps like Google Drive and Dropbox have an auto¬upload feature that will do all the work for you.

The new notification menu update in Android 4.1 gives you quick shortcuts to some of your apps. You'll receive notifications regarding incoming emails, any missed calls, and app-related content.

If you have a wide selection of apps on your device, chances are you won't keep tabs when each app requires an update. To make things easier you can enter the My Apps section on the Play store and choose the Auto Update option to do the laborious work for you.

There are a series of apps that let you control your phone via gestures. Apps like Gesture Search will save you having to go through menus to find something, and instead will do the work for you with a simple shake of the phone.

Create automatic phone tasks
Use Impel to automate tasks that would usually take longer to complete

Apps like Impel - Automatic Tasks enables users to easily create a series of ready-to- use tasks that are based entirely on a range of gestures and shortcuts you utilise on your device. Tasks can range from the simplest of things; such as making your phone vibrate when you connect your headphones, or more advanced tasks, such as opening an app when a USB adapter is connected, or uploading a type of file when an application is opened. In this tutorial we'll guide you through the Impel app, and show you the various pages you need to sieve through to create a task.

Add a new task
Open up the Impel app and select the Add a new Task option from the main menu. You can now select the type of action you want to complete. For example, you can select to create a task involving the USB port, a certain page on your device, or even your 3.5mm audio jack.

Select an action
After choosing the type of task you want to set up, you’ll now be able to select an action relating to it. As before, the variety of actions are pretty varied. From this same menu you can modify a current action or task you’ve created. Select the action you want to use for this task.

Use an application
In some cases the actions you want to use will require you to choose an app to load. From this menu you’ll find all your installed apps can be selected and used in conjunction with the action and task you’re setting up. Press the Confirm button once you’ve selected the correct app.

Save your new task
To finalise the task you’ve created, you’ll need to enter a new title and description on the next page. Once saved, the task can be toggled on and off from the list of tasks on Impel’s homepage. You can go back to any previous pages if you need to edit the task.

How to Share files with Wi-Fi Direct

ndroid: Wi-Fi Direct lets you send share files to other devices the easy way. Wi-Fi Direct is a great way of connecting to other devices to perform simple tasks. The main difference between this and many other similar services is that you don't need to be connected to the internet to start sharing and connecting with others. As well as phones, Wi-Fi Direct can also be used in conjunction with several other electrical devices. For example, using Wi-Fi Direct, you can quickly send your files to a nearby wireless printer or transmit video from your phone to your TV. Although it isn't available on all Android devices, as of yet, it's still a great piece of software, that's easy to get to grips with.

Open your settings
From your device’s home screen, open up your Settings menu and navigate to the Wireless and Networks tab. If your device is Wi-Fi Direct compatible, you should see it listed near the bottom of all your settings here. By default it will be switched off, so flick the switch to activate it.


Add a name
After opening up the Wi-Fi Direct menu, press on the Options button on your device, and select Device name. This will now bring up the keyboard on your device, and allow you to enter a name which will represent your phone when other people search for it. Press the OK button once you’ve completed it.

Begin a scan
Press on the Scan button when you’re ready to start searching for other devices and electrical items to connect to. Any devices that then appear on your screen are Wi-Fi Direct compatible, such as phones that have the feature turned on. In a similar fashion to Bluetooth, you’ll need to enter a PIN code to connect. From the list of options you’re presented with, select the one you want to connect to.

Send and share
No matter what you’re connected to, you can begin sending files to it. Open up the Gallery app on your device, or any other app where your media files are kept, and press on the Share button usually located
on the top of the app. From here you should now see the Wi-Fi Direct option become visible. Select it and your file will begin transferring.

Multi-connect
Next to the Scan option is Multi-connect. Not only does this option let you connect to numerous devices at the same time, it’s also the best way to connect to another device if you want to play games. Not all devices support the Multi-connect feature, so you’ll need to select it once you have scanned for devices to see which ones are compatible. You’ll find most televisions do support the Multi-connect feature, as do modern games consoles. Devices like printers and Hi-Fi systems tend to not support this feature, however.